If your camera roll has turned into a chaotic mix of screenshots, duplicate bursts, memes, receipts, and 37 versions of the same sunset, you’re not alone. The problem isn’t that you take “too many” photos — it’s that your phone never gave you a simple process for what happens after you take them.
This guide gives you a fast, repeatable system built around three actions:
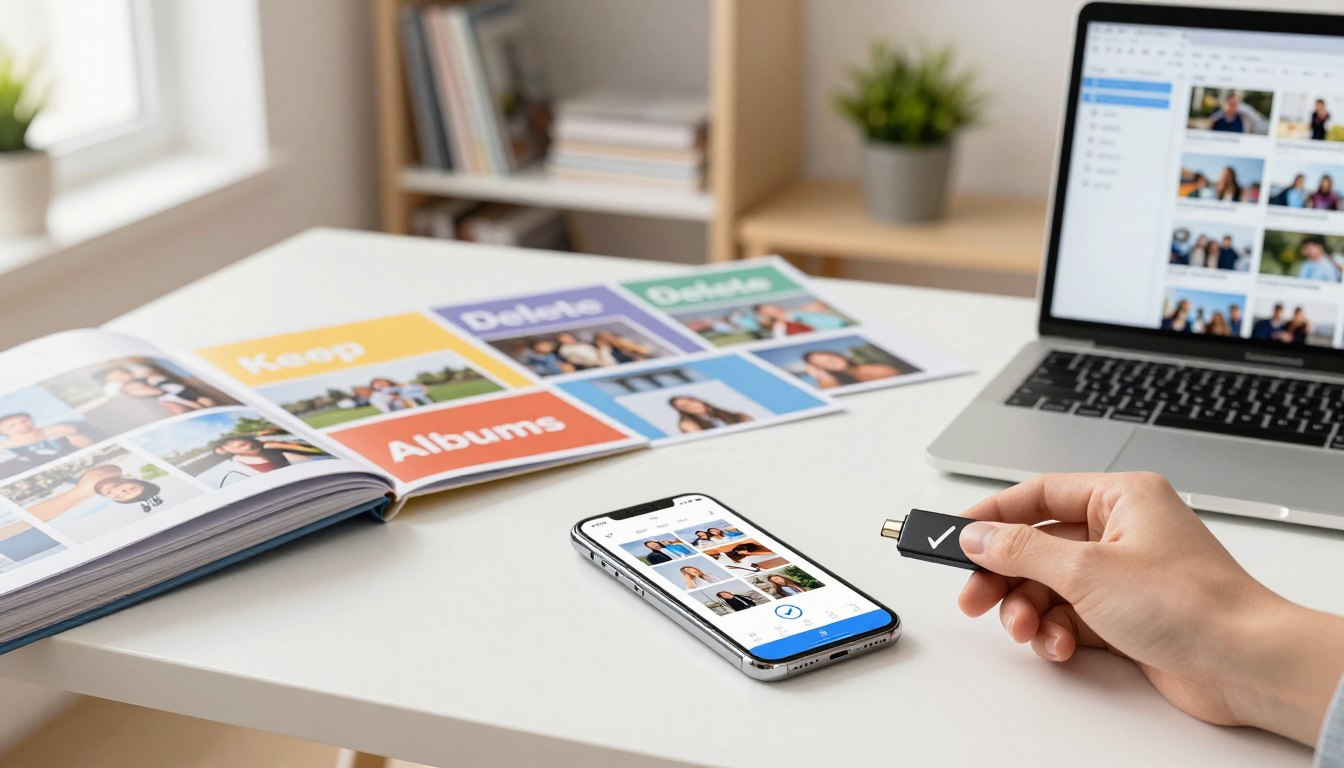
- Keep: Save the best images on purpose (not by accident).
- Delete: Remove the clutter that makes everything harder to find.
- Album: Put “keepers” into a small set of albums that match your real life.
It’s designed for normal people with thousands of photos — not for photographers with unlimited time. You’ll start seeing results in your first 20 minutes, and you can finish the full clean-up in short sessions over a week.
Quick Start: 20 Minutes to Get Unstuck
If you’re overwhelmed, don’t begin by scrolling from 2019. Start with a quick win:
- Back up (so deleting feels safe).
- Clear obvious junk: screenshots you don’t need, blurry shots, accidental pocket photos.
- Create 6–10 “core albums” (you’ll use them right away).
- Sort only the last 30 days using the 5-second rule.
- Empty “Recently Deleted” when you’re done for a real storage boost.
Once you see your camera roll shrink, motivation comes back. Then you can keep going in fast batches.
Why Your Phone Photos Need a Fast Organization System
A messy photo library costs you more than storage. It costs time. When you need a picture for a form, a memory for a birthday post, or a screenshot you saved “somewhere,” you end up scrolling for minutes — and minutes add up.
Clutter also creates a subtle mental tax. You open Photos to find one thing and get dragged into a sea of random images. A clean library does the opposite: it turns your photos into something you can actually use.
| What changes | What you get |
|---|---|
| Fewer duplicates and screenshots | Faster search and less scrolling |
| Clear albums you trust | Easy sharing and quick “memory finds” |
| Regular clean-up habit | Storage that stays free long-term |
Prepare Your Phone Before You Start (So You Don’t Lose Anything)

Organizing is easiest when you’re not scared of deleting. So do this first — it takes 5–10 minutes and prevents regret later.
1) Back up your photos the right way
On iPhone: If you use iCloud Photos, your library syncs across devices. That’s convenient, but it also means deleting on one device can remove photos everywhere. Before a big clean-up, confirm iCloud Photos is on and fully synced or that you have another backup you trust.
On Android (and on iPhone with Google Photos): Open Google Photos → make sure Backup is on → confirm it finishes backing up before you delete. Google Photos also has a “Free up space” option that removes device copies of photos that are already backed up (useful when storage is tight).
2) Check your available storage (and stop the bleeding)
Go to your phone’s storage settings and look at what’s taking space. If Photos is huge, that’s normal — videos especially can quietly eat tens of gigabytes.
- Turn on “Optimize Storage” (iPhone) if you use iCloud Photos and your device is constantly full.
- Remove large videos you truly don’t need (screen recordings are common offenders).
- Empty “Recently Deleted” after your clean-up session, otherwise you won’t actually reclaim space.
3) Pick your “organization device”
You can do this entirely on your phone. But if you have an iPad, a big Android tablet, or even a laptop with your cloud library open, sorting feels faster because you can see details and tap more accurately. The best device is the one you’ll actually use for 20 minutes today.
The Keep or Delete Decision Framework (No Overthinking)

Decision fatigue is the enemy. The goal is not to curate a museum — it’s to create a photo library that’s easy to live with. Use these rules to move quickly.
Photos to keep (almost always)
- People you care about (especially candid moments you can’t recreate).
- Milestones: birthdays, graduations, trips, first days, celebrations.
- “Reference” photos that save time later: parking spot, product serial number, recipes you actually cook, house measurements.
- Documents you might need: receipts, IDs, insurance, warranties (better stored in a dedicated “Documents” album).
Photos to delete immediately
- Blurry shots that aren’t meaningful (most accidental motion blur).
- Duplicate screenshots (especially “I’ll read this later” screenshots from months ago).
- Bursts where 34 photos are identical and only one is good.
- Random photos you don’t recognize (pocket photos, accidental camera opens, test shots).
How to handle duplicates and “almost the same” shots
When you have 10 versions of the same moment, choose one “best” photo based on faces, focus, and feeling. If you have to zoom in and compare eyelashes, you’re doing too much. Pick quickly:
- Keep one you’d actually share or print.
- Keep one backup only if it’s meaningfully different (a different person smiling, a wider view, a different angle).
- Delete the rest and trust your choice.
Tip: On iPhone, check the Duplicates utility (it can merge duplicates). On Google Photos, search for “screenshots” or “videos” and clean those categories in a focused batch.
How to Organize Phone Photos Fast: The Speed Sorting Method

This is the method that makes organizing possible even when you’re busy. You’ll do short, focused “sprints” instead of one painful all-day project.
The 5-second rule
Give yourself five seconds per photo. Your brain usually knows whether an image matters. If you hesitate, it’s usually because the photo is “fine” but not special. In that case, keep the best one from that moment and move on.
Sort in batches, not in history order
Chronological scrolling is slow. Batch sorting is fast. Use built-in filters and searches:
- Screenshots (easy wins)
- Videos (big storage wins)
- Duplicates / bursts
- Downloads (memes, images saved from web)
- Recent month (build momentum first)
Use a timer so you don’t burn out
Set a timer for 10 minutes. Sort as fast as you can. When it goes off, stop — even if you want to keep going. Short sessions prevent the “I hate this” feeling and make it easier to return tomorrow.
Create an Album System That Works in Real Life
Albums only work when you can remember where a photo should go without thinking. The best album system is small, obvious, and slightly boring — because boring is sustainable.
Start with 6–10 core albums
Here’s a practical set that fits most people. Use what applies and skip the rest:
- Family (or “Kids” / “Parents”)
- Friends
- Trips & Travel
- Celebrations (birthdays, weddings, holidays)
- Home (renovation, furniture ideas, before/after, receipts)
- Work / School (whiteboards, notes, project photos)
- Documents (IDs, warranties, medical paperwork, receipts)
- Inspiration (recipes, outfits, design ideas — only if you actually revisit these)
If you have a hobby that generates many photos (fitness progress, art, pets, cooking), create one album for it. The rule: if an album won’t get used at least once a month, don’t create it yet.
Use names that sort automatically
For trips and events, a consistent naming format makes everything easier to scan. Two formats that work:
- YYYY – Event (example: “2026 – Paris Weekend”)
- Location – Month YYYY (example: “Paris – Feb 2026”)
Pick one format and stick to it. Consistency beats creativity here.
Don’t try to album every photo
Your camera roll can remain a “recent inbox.” Albums are where the best photos go. Aim to album the top 10–20%: the ones you’d actually look for again, show someone, or keep long term.
Step-by-Step: Keep, Delete, and Album Your Photos
This is the full workflow. Run it once for a big clean-up, then reuse it weekly.
Step 1: Delete the obvious rejects first (fast wins)
Start with categories that are easy to judge: blurry shots, accidental photos, duplicates, old screenshots, and “why did I save this?” downloads. You’ll feel progress immediately.
Step 2: Create your core albums (once)
Create your 6–10 core albums now. Don’t worry about perfect categories. You can rename albums later, but you’ll organize faster if the shelves already exist.
Step 3: Sort recent photos into albums (30 days first)
Sort the last 30 days before you touch older photos. Why? Because recent photos have context you still remember. You’ll make faster decisions and build the habit you’ll keep using.
- Tap the best photo(s) from a moment.
- Add them to the right album.
- Delete obvious rejects from that same moment.
Step 4: Work backwards in “date blocks”
After the recent month, go backwards in three-month blocks. Set a 15–20 minute timer per block. This is the sweet spot: it’s enough time to see progress, but not enough time to hate your life.
Step 5: Do a final duplicate sweep
Once you’ve sorted and deleted, do one last sweep for duplicates and near-duplicates. Many phones group similar photos automatically. This is where you can reclaim surprising amounts of space.
Step 6: Empty “Recently Deleted” to reclaim storage
This step is easy to forget. Deleting a photo usually moves it to a trash folder for ~30 days. If you’re cleaning photos to free space, go to Recently Deleted and clear it after you’re confident you didn’t delete anything important.
Apps and Tools That Speed Up Photo Organization
You can do everything with built-in tools, but a few features make the process much faster.
iPhone: use the built-in shortcuts
- Search: Try searching “receipt,” “dog,” “beach,” or a city name. It’s great for batch sorting.
- People & Pets: If enabled, you can quickly jump to photos of specific people for easy curation.
- Duplicates: Check the Duplicates area to merge true duplicates.
- Favorites: Use the heart as your “Keep” flag when you’re unsure where a photo belongs yet.
Android / Google Photos: use these power features
- Search: Search by people, places, and things (“mountains,” “passport,” “concert”).
- Free up space: Removes local copies that are already backed up.
- Archive: Hide images you don’t want in your main feed (like memes or reference pics) without deleting them.
- Device folders: Review folders like WhatsApp/Downloads to delete or album in bulk.
Optional: a third-party app for faster swiping
If you like swipe-based sorting, apps like Slidebox are built specifically for “keep, delete, album” workflows. Use it if it makes you more consistent — but you don’t need it to get organized.
Maintain Your Organized Photo Library (So It Stays Done)
The real secret isn’t one big clean-up. It’s a tiny habit that prevents the pileup from returning.
Weekly: the 5-minute camera roll reset
- Open your “Recent” photos.
- Delete screenshots you no longer need.
- Favorite or album the best photos from the week.
- Stop after five minutes — consistency matters more than perfection.
Monthly: a 20-minute deep clean
| Monthly task | Why it helps |
|---|---|
| Review videos & screen recordings | Fastest way to reclaim storage |
| Run a duplicate sweep | Keeps “near-duplicate creep” under control |
| Check Downloads / Messaging folders | Stops memes and forwarded images from taking over |
| Back up one more time | Protects your library before another big delete |
Common Mistakes (And How to Avoid Them)
Mistake 1: Trying to sort everything into albums
Album only what you care about. If you try to album every single photo, you’ll quit. Keep albums for “meaningful” and “useful,” and let the rest live in Recents until your next reset.
Mistake 2: Deleting before you’ve confirmed backup
Backups remove fear. Confirm your photos are safely backed up before you do a large purge — especially if you’re changing phones soon or you’re organizing years of images.
Mistake 3: Forgetting the trash folder
If you’re trying to free storage and nothing changes, the photos are usually sitting in “Recently Deleted.” Empty it after each clean-up session once you’re confident.
Conclusion
You don’t need a perfect photo library. You need one that helps you find your best memories quickly, keeps your storage under control, and doesn’t turn into a stressful project.
Start small: back up, delete obvious junk, and create a handful of albums you’ll actually use. Then maintain it with a five-minute weekly reset. Your future self will thank you every time you search for a photo and find it instantly.
About the author
Habertor Editorial Team writes practical, no-fluff guides to digital organization, productivity, and everyday systems that save time. Our goal is simple: clear steps you can follow in one sitting, plus small habits that keep things tidy.
Last updated: March 2, 2026
FAQ
What’s the fastest way to organize thousands of phone photos?
Don’t start from the oldest photo. Start with the last 30 days, delete screenshots and duplicates first, then work backwards in 3-month blocks using a 15–20 minute timer.
How many albums should I create?
Start with 6–10 core albums that match your real life (Family, Friends, Trips, Celebrations, Home, Work/School, Documents). Add a new album only when you repeatedly wish you had it.
Should I keep screenshots in my photo library?
Keep only the screenshots you still use. If you’re saving screenshots as “notes,” move the important ones into a Documents album (or a notes app) and delete the rest weekly.
Why didn’t deleting photos free up space?
Most phones keep deleted photos in a trash folder for a while. Check “Recently Deleted” (or Trash) and empty it after your clean-up once you’re sure you didn’t delete anything important.
What should I do with photos of documents and receipts?
Create a dedicated Documents album and move them there. Once you’ve confirmed they’re backed up, consider also saving critical items (like passports or insurance cards) in a secure document vault or encrypted note.
How do I keep my library organized long-term?
Do a five-minute weekly reset: delete junk, favorite your best shots, and album a few keepers. Then do one 20-minute deep clean each month for videos, duplicates, and downloads.